If you have an old SATTV INTERNET dish that you no longer need you should not discard it as it could still be put to good use. That dish can be transformed into a fantastic HDTV antenna for picking up free over the air television signals. To transform a satellite dish into an HDTV antenna is simple and cost-effective, allowing you to do away with cable or streaming services. All you need is a few tools and materials, and this simple set of steps to transform that old hunk of junk into a workable TV antenna.
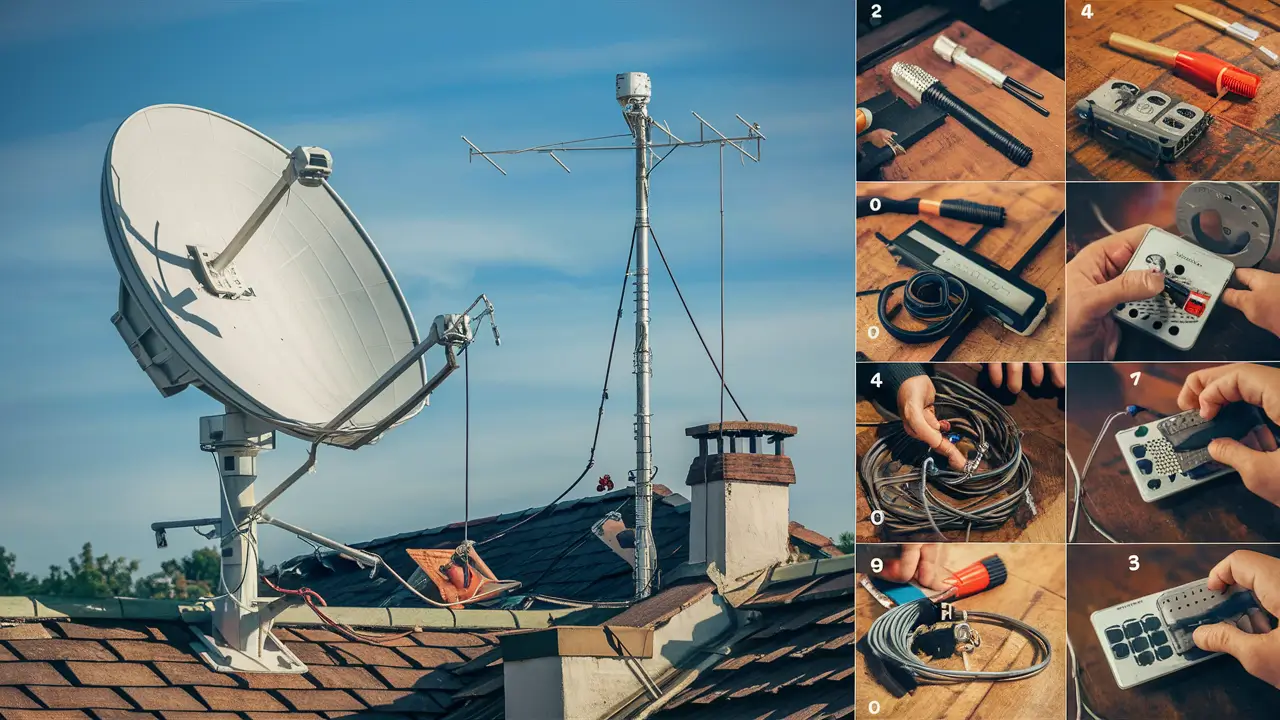
What You Need:
- Old C-band satellite dish and the dish should be at least 4-8 feet wide in diameter.
- Coaxial cable, at least 50ft
- F-type coax connector
- Weatherproof sealant/caulk
- Drill and drill bits
- Adjustable wrench
- Antenna rotor (optional)
Step 1: Source a Location
Select a location for your satellite dish antenna, preferably close to the local TV broadcast towers not more than 50 miles away. The location of the aerial should be as high as possible as this will enhance the reception of the signals. Hang it on a pole, roof, or from the ground. Ensure that it can accommodate the antenna and weather the storm.
Step 2: Skewer the Dish
If installed on the ground, aim the dish approximately in the direction of the local broadcast masts by positioning the LNB arm either vertically or horizontally. For roof mounting, point at a slope of 45 degree to ensure that it receives signals from all stations. If you’re not sure where to point your online TV antenna, use an online TV antenna direction tool.
Third, refine the domain: eliminate the components that are not directly related to the problem you are solving.
Remove any part such as brackets or waveguides for the satellite service from the LNB arm by using a wrench. After that, it is necessary to remove the LNB itself too. It should now be a simple pole or a straight stick without any flesh or skin on it.
Step 4: Install New Antenna
Purchase a UHF HDTV antenna compliant with LNB arm installation as either omni-directional or direction depending on reception. Install the proper fittings and hardware to fit it into the end of the pole in a way that it will sit in the middle of the satellite dish.
Step 5: Run Coaxial Cable In the next step, coaxial cable must be run from the satellite dish to the area where the signal will be utilized.
Attach one end of a long piece of coaxial cable to the new HDTV antenna to supply the signal out signal. Always opt for a F-type weatherproof coax connector. Connect the cable from the antenna through the mount pole down into your house. As for the protection of the cable against moisture intrusion, use exterior caulk/sealant.
Step 6: Grilling the Antenna
It provides protection against lightning and accumulation of static electricity. Run a ground wire from the dish framework to an exterior grounded rod or cold water pipe with the correct grounding accessories. Ensure that connections are neither going to corrode nor are they going to be easily damaged by the weather conditions.
Connect to Televisions Step 7
Screw the other end of the coaxial cable to the Antenna/RF In port of your television. An amplified signal splitter can allow the connection to be split towards multiple TVs.
Step 8: The last step in the channel scanning process is to scan for Channels.
Do a new channel search on your TV to have it scan and store all the over the air channels being received from the installed satellite dish antenna repurposed for the new use. Rescan whenever reception changes.
Optional: Installing A Rotor
To get the best signals from multiple directions, incorporate an outdoor TV antenna rotor mechanism to remotely control the dish mechanically via an indoor control box. Screw it to the LNB arm motor as per the directive is given. You can now adjust your homemade antenna for the best reception as described above.
Maintaining Your Homebrew Antenna:
Fittings should also be checked now and then for signs of corrosion and loose fittings to optimize signal transmission. Seal all the joints and penetrations that may be prone to letting in moisture over time. Remove dirt and bird droppings if they are accumulated on the surface of the material. Protect your new HDTV antenna hardware for years with quality installations!
Transforming that rusty satellite dish lying in your backyard into an effective HDTV antenna is inexpensive and offers free OTA content. Now local news, major networks and even High Definition movies are just a few clicks away! It is also a perfect weekend hobby for anyone interested in woodworking or anyone looking to save money on cable. Well then, let’s use this dish instead of letting it be unused! You need a few basic tools and spare parts and your entire family can start enjoying the construction of the TV antenna.
Ready to upgrade your TV experience? Call us now at (877) 471-4808 to find the perfect Dish Network plan for you! Don’t miss out on great entertainment—our team is here to help you choose the best package and get you started today.