-
Posted on: 13 Aug 2024
-
Do you need to be informed on how to program your Dish Network DVR to record shows on the second television (TV 2)? Recording programs on other TVs connected to your Dish receiver can be a bit challenging especially if you do not know which settings to look for. Fortunately, it is very simple once you get the hang of it. So, in this article, I am going to explain how to set TV 2 on Dish Network DVR step by step, to record programs. No matter whether you are using a Hopper, Joey, Wally, or any other Dish receiver, follow the instructions below to program your second television.
Prerequisites
Before we get into the step-by-step guide, make sure your Dish equipment meets a few requirements:
- You have a compatible Dish Network HD dual-tuner DVR receiver such as Hopper, VIP, or Wally
- TV 2 is linked to your main Dish receiver box through the “TV2 Out” coaxial port
- There is a TV 2 which is on and set to the right input.
Technically, if everything is connected well, you should be able to have a picture displayed on TV 2. Well, now that we’ve gotten our overview and introduction out of the way, let’s go ahead and set up some recordings!
Access Dish Settings Menu
The first step is to access the Dish settings menu:
- Switch on your television and Dish receiver box. Ensure that TV 1 is on and tuned to actual live television shows.
- Take the Dish remote control and then locate the Menu button on the remote and press it. This will bring out the primary Dish settings menu, which is as follows.
- Respond to the questions by moving the cursor over each option using the arrow buttons and selecting the Select button.
From the main menu, it is possible to set up the DVR recording for the two television sets which are TV 1 and TV 2.
Switch Menu Control to TV 2
Now that you are here in the Dish settings menu, move the control back to the TV 2:
- Navigate the cursor to the “Extensions” tab and click on it, then click on the “Settings” and choose the “TV2 Setup” checkbox.
- Select “TV2 Control” and make it On.
You can now easily get DVR settings for that particular TV when the option of TV2 control is on. The settings will only be effective for the programming and recordings associated with the output for TV 2.
Enable Single Mode
To set recordings for TV 2, you need to switch the Dish receiver into Single Mode:
- In the current TV2 settings, turn on Single Mode.
- Go to the Single Mode option and turn it on.
Single Mode locks the Dish receiver to one particular TV output while taking control of it. It enables you to schedule DVR recordings for that particular TV (as seen above, we are dealing with TV 2).
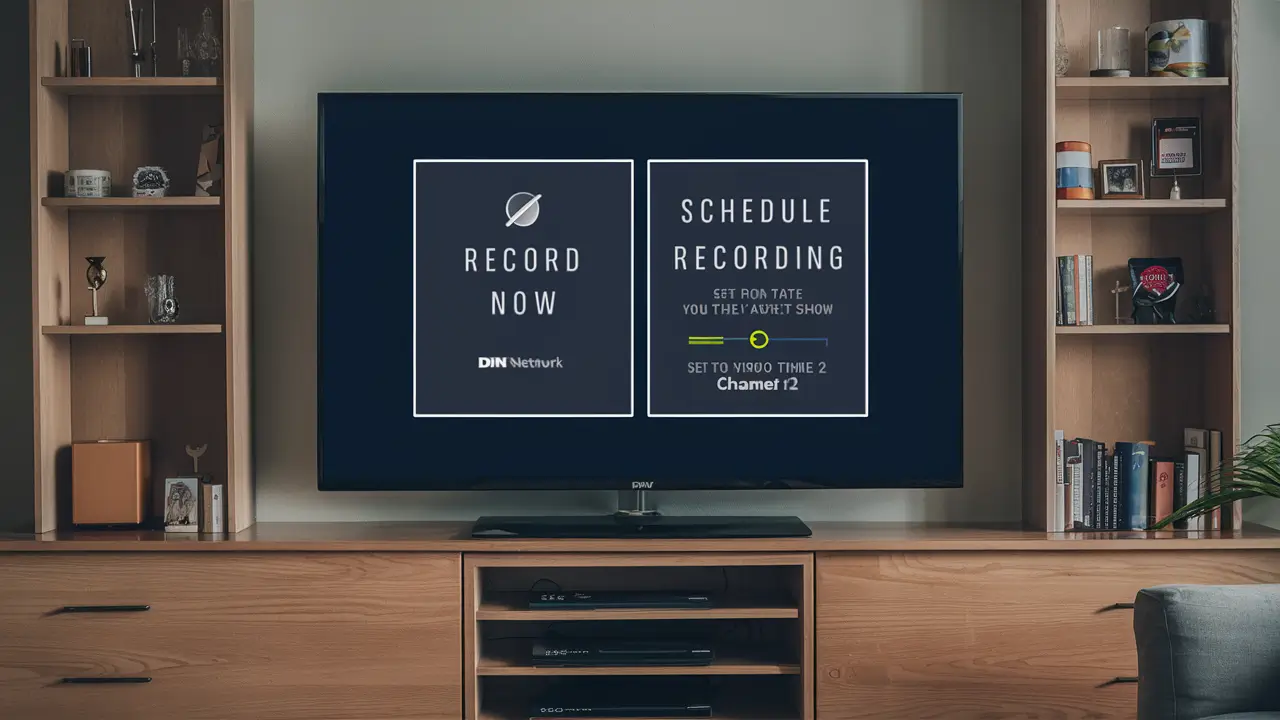
Schedule Recordings for TV 2
Now, the Dish receiver is going to accept commands from the remote only when pointed towards the second television. Here is how to schedule recordings:
- While in Single Mode, go to your DVR menu or program guide. Choose a future program on TV or a movie that is going to be aired and which you would like to record.
- Select Record or Record Series. This has the effect of scheduling a recording on TV 2.
- Do this again to schedule more programs for recording to TV 2. All the scheduled recordings will now go only to the output channel for TV 2.
The recordings will only appear if played under the setting and program list of TV 2. TV 1 has its own separate DVR queue list.
Hopper vs Standard DVRs
However, there is a Hopper 3 DVR from Dish that I found interesting. In the Hopper’s “Multi-Channel View” mode, three channels/recordings are shown on the screen at one time. The same Single Mode should be used to ensure that the recordings made are relevant to the output of TV 2.
Moreover, Hoppers are equipped for Primetime Anytime automated primetime recordings across connected TVs. Thus, despite having the Single Mode, TV 1 and TV 2 can have the same program recordings in common.
Exit Single Mode
Once you finish scheduling DVR recordings for TV 2, exit Single Mode:
- Go back to the settings menu of the TV 2.
- Select Single Mode and turn off the corresponding button.
Now the Dish receiver once again takes independent control of both TV connections once again.
Confirm Scheduled Recordings
To check the subsequent performances for TV 2:
- Gently press the DVR button on the Dish remote.
- Select Scheduled Events.
When you look at the schedule, you should be able to view the list of recordings that are planned for the programming associated with TV 2.
As the air times draw near, your Dish receiver will switch to the right channel and record each program on the output channel of TV 2.
Enjoy Watching Your Recordings!
You can now sit back, chill, and watch your recorded shows on your preferred secondary TV as and when they are programmed to air! You let your Dish receiver record show to whichever connected TV simply by making a few changes on the menu.
Ready to upgrade your TV experience? Call us now at (877) 471-4808 to find the perfect Dish Network plan for you! Don’t miss out on great entertainment—our team is here to help you choose the best package and get you started today.