If you are canceling your SATTV INTERNET provider and no longer require the dish, then dismantling it is easy and cost-effective. Though the process of dismantling a satellite dish is not very complicated if you take some necessary precautions. Below are the steps to follow when removing satellite dishes from your home safely.
What You'll Need
Before you start taking down your satellite dish, make sure you have the following tools and safety equipment:
- Ladder
- Adjustable wrench
- A cordless drill which comes with a Phillips head attachment.
- Wire cutters
- Cable closure caps that are waterproof
- Electrical tape
- Tarp/drop cloth
- Safety glasses
- Work gloves
Safety First
Cutting a satellite dish also involves climbing to heights, handling electrical current as well as handling broken glass and sharp edges when cutting the dish. Before getting started, keep these safety tips in mind:
- It is recommended to use a fiberglass ladder to reduce the chances of being shocked by electricity.
- Make sure that there is someone to hold the ladder as you work
- Always put on safety goggles/glasses while working.
- Put on gloves to protect your hands
- When working on the roof, use a drop cloth.
- It is very important not to cut wires while they are live.
- Make sure all wires are connected properly and all ends are capped.
Disconnecting Cables and Wires
Start by disconnecting the satellite dish from any power sources:
- Disconnect the cable that supplies power to the satellite dish from an outdoor power source.
- Find the grounding wire that is connected to the dish stand or the pole that supports the dish. In this case, you need to use the wire cutters to cut the wires.
- Trim any coaxial cables that are connected to satellite receivers within the house. Carve neatly 6 inches away from the dish.
- If there are wires that are not connected, put a weatherproof cap over the ends to avoid the onset of moisture. Tightly wrap caps with electrical tape to enhance the security of the seal.
Removing Mounting Hardware
Next, start dismantling the satellite dish components:
- If there are any nuts and bolts used to attach the LNB (low noise block downconverter) and feed horn to the dish surface, you should use an adjustable wrench or an appropriately sized socket to remove them. Detach and set aside.
- Loosen and disconnect any screws, nuts, or bolts that were joining the dish pole/arm to the dish base. If screws are bonded, use penetrating oil, allow it to soak for ten minutes, and hammer gently to break bond.
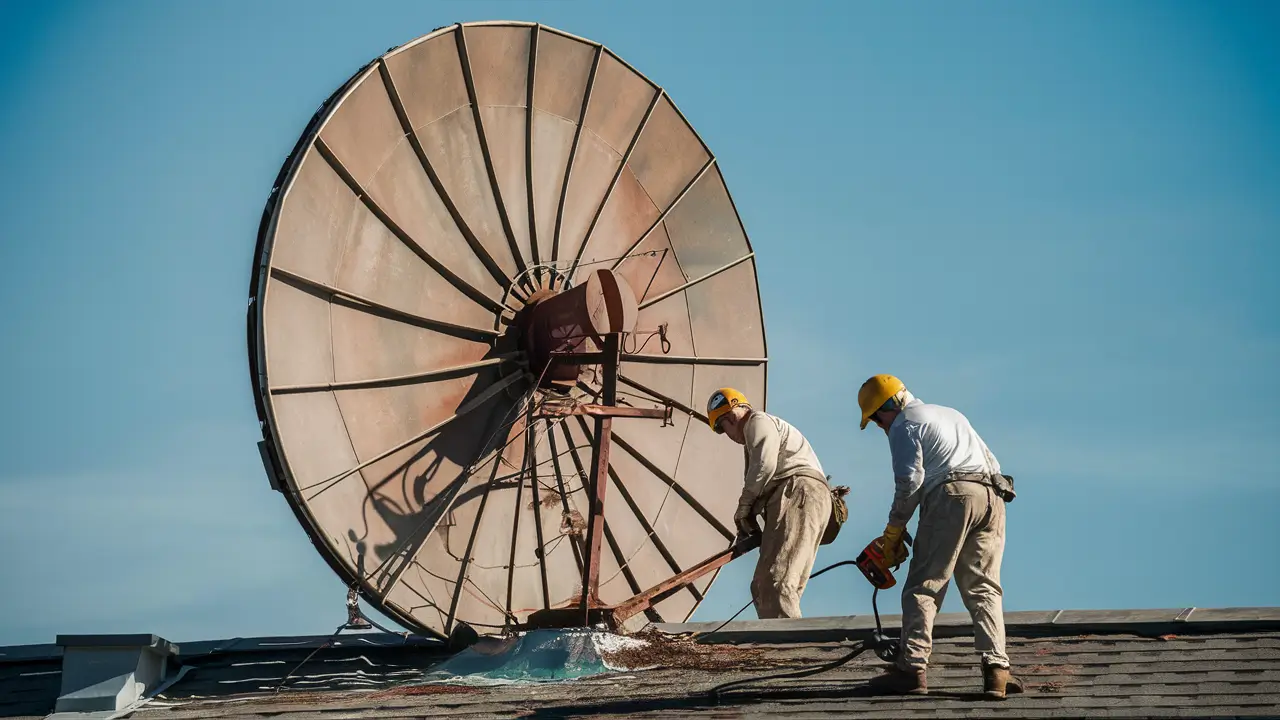
Taking Down the Dish
With all wiring disconnected and mounting hardware removed, you can now take down the satellite dish assembly:
- I suggest having someone else hold the ladder while working at the top of it. Clean your hands and climb the ladder and position yourself in a manner that you can easily access the dishes.
- In a gradual manner, the dish should be inclined backward, placing the dish on the roof or ladder. This will enable manipulation to get to the base fasteners.
- Using screwdriver or wrench, now remove all those screws, nuts or bolts which hold base part with roof or wall. Slide dish away from mounting surface.
- With the helper holding it from the bottom, slowly lower the satellite dish off the roof. Be sure not to drop.
- After removing these components, ensure that they are placed on a drop cloth. Dispose of any remnants or shattered pieces.
Sealing the Installation Site
With the equipment taken down, seal up any holes or penetrations left from the satellite mount:
- Use waterproof silicone caulk to seal all screws where roof/wall mounts were fastened.
- Identify spaces where cables/wires, had penetration through exterior walls. This should be done through a thorough application of silicone sealant so as to seal any hole or gap that may be on the surface.
- For intact roof penetrations, it is recommended that one uses rubber stoppers or weatherproof caps. Secure with sealant.
- Applying flashing tape and extra sealant must help you close any roof holes that reveal the interior.
Cleaning Up
The final steps involve cleanup and prep work for removing the equipment:
- Collect remaining dish parts and take out from roof-top carefully.
- Disassemble all satellite dish, LNB, and mount pieces and put them on the ground for disposal or recycling.
- Screw any removed wiring and cabling into tidy coils.
- Sweep a roof gently to get rid of small particles on the roof using a broom. Carefully descend ladder.
- Lower and safely stow the ladder away.
- The proper disposal or recycling of satellite dishes, cables, and other mounting hardware must be done in an environmentally friendly manner.
And there you have it, you have learnt how to take out a satellite dish safely. It is important to run new cables, uninstall the mounts, cover up the holes, and sweep the area to avoid water damage, electrical shocks, or accidents after the dish is removed. Congratulations on your new home without a satellite!
Ready to upgrade your TV experience? Call us now at (877) 471-4808 to find the perfect Dish Network plan for you! Don’t miss out on great entertainment—our team is here to help you choose the best package and get you started today.